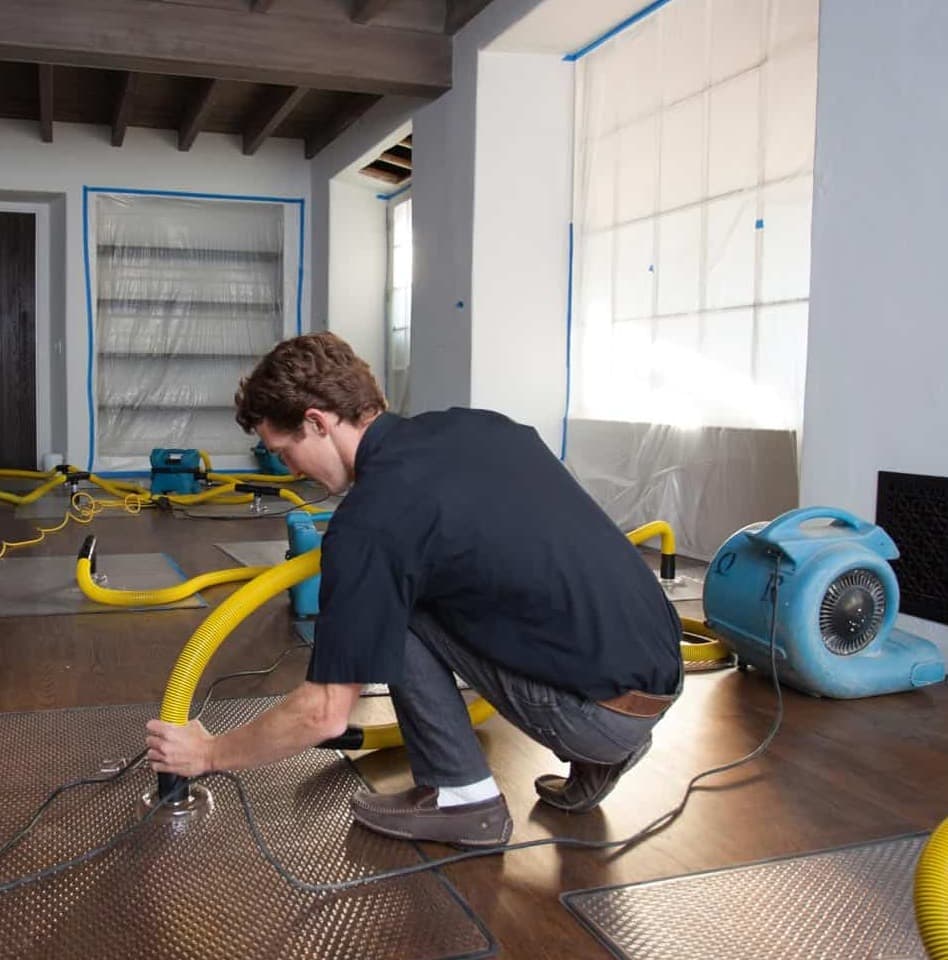
The first thing you see is the cabinet next to it going soft, and that is not a coincidence. A removable panel hides the recess, so a slow leak runs for weeks before anything shows. On site in 60 minutes. The estimate is free.
This guide is published by Prime Restoration, a Michigan licensed residential builder and water damage restoration contractor in Sterling Heights. Repairing or replacing the appliance is an appliance and plumbing trade and we do not do it. We handle what the water did, and we will tell you which call to make first. Written for Macomb and Oakland County. Last updated 2026-09-07.
The thing nobody writes down
Because the recess is designed to be hidden, and the cabinet next door is designed to soak.
A dishwasher sits in an opening between two cabinets, on the subfloor, with its own base pan underneath it and a removable toe-kick panel across the front. That panel conceals the entire floor of the recess. So for the first weeks of a slow leak there is nothing to see from the kitchen at all, and the machine keeps running normally the whole time.
Meanwhile the water does what water does. It spreads out across the subfloor and reaches the cabinets on either side. And the base of a kitchen cabinet is very often particleboard or MDF, sitting directly on that subfloor, in a cavity with almost no ventilation. Those materials wick from the underside and from every cut edge, and they swell visibly when they do.
So the first symptom of a dishwasher leak is almost never the dishwasher. It is a cabinet base that has gone soft when you press it, a toe-kick that looks swollen at the bottom, a floor seam lifting at the front edge of the appliance, or a musty smell in a cupboard. The neighbour shows first because the neighbour is the only part of it you can see.
Two consequences follow, and they are the reason to read the rest of this page.
Volume is not the useful measure here. A dishwasher leak can be a few ounces per cycle and still take out cabinet bottoms, flooring seams, the toe-kick space and the subfloor, because it is landing repeatedly on materials that respond badly and do not recover.
The single most useful thing you can do costs nothing. Take the toe-kick panel off. It is usually two screws or a snap fit and it takes under a minute. Everything the leak has been doing is behind it.
Mechanism
Six failure points, and they are separable by when in the cycle the water shows up. That is the whole diagnosis and you can do it yourself with five minutes and a torch.
| Failure point | What it actually is | How you tell | Whose job it is |
|---|---|---|---|
| Door gasket | The rubber seal around the door tears, cracks or goes brittle with age, or it rolls out of its channel when the unit is pushed into place. | Water on the floor in front of the unit, at the toe-kick, and only during a cycle. Often a thin line rather than a pool. | A gasket is a homeowner or appliance-tech job. It is one of the cheaper fixes on this list. |
| Water supply line and its fitting | The line feeding the inlet valve, or the compression fitting at either end. A loose connection, a failed gasket, or a fitting that was over-torqued or cross-threaded at install. | Water present whether or not a cycle is running, because this side is under pressure all the time. This is the version that fills a kitchen rather than dampening one. | A plumber or appliance tech. Under-sink shut-off first if you can reach it. |
| Water inlet valve | The valve at the bottom of the unit that lets water into the tub. The body can crack, often from over-tightening the supply fitting into it. | Water underneath rather than in front, appearing at the start of a fill. | Appliance tech. It is a part replacement rather than a plumbing job. |
| Drain hose and its clamps | The hose from the pump to the disposal or the sink drain. Loose clamps, splits from age, kinks, or a connection that was never made properly. | Water at the drain end during the pump-out phase of a cycle. Often inside the sink base rather than at the dishwasher at all. | Appliance tech or plumber. The sink cabinet is where to look first, and it is the easiest place on this list to inspect yourself. |
| Pump seal | The seal around the circulation or drain pump under the tub. | Water underneath, during a cycle, with no obvious path from anywhere else. | Appliance tech. On an older unit this is often the point where replacing the machine gets discussed. |
| The tub or the heating element seal | A crack in the tub itself, or the seal where the heating element passes through the bottom. | Water underneath and toward the back, with the unit otherwise running normally. | Appliance tech, and this is usually the end of that machine. |
The one to worry about is the supply side. Everything else on that list only leaks while the machine is running, which caps how much water can arrive. A weep at the supply line or the inlet valve runs twenty four hours a day whether anybody is home or not, and that is the version that gets found by a swollen cabinet rather than by a puddle.
The second thing nobody writes down
Usually not. Five install faults account for most of it, they are a known and short list, and you can check two of them from inside the sink cabinet before anybody is called out.
The disposal knockout plug was never removed
A new garbage disposal ships with a plug sealing the dishwasher inlet. If the installer connects the drain hose without knocking it out, the dishwasher has nowhere to send its drain water. It is the single most common new-install fault and it is a five second check with a torch.
No high loop and no air gap on the drain hose
The drain hose must not run flat from the unit to the sink drain. It needs either a high loop fastened up under the counter or an air gap fitting on the sink deck. Without one, sink water can run back down the hose into the dishwasher, and the dishwasher can push water the wrong way. You can see this from inside the sink cabinet without tools.
The unit is not level
If the machine leans forward, water collects near the door instead of staying where the manufacturer intended, and it goes over the lip. A unit that has been pulled and refitted, or one sitting on a floor that was replaced around it, is the usual candidate.
The door gasket was pinched on insertion
When the unit is pushed into the recess, the gasket can roll, twist or pull out of its channel. Nothing is broken and it still leaks, which is why a new or recently reinstalled dishwasher leaking at the door is so often this rather than a fault.
The water connection was over-tightened or cross-threaded
Too much torque cracks the valve body. Starting the fitting at the wrong angle cross-threads the plastic. Both produce a slow weep on the pressurised side, which is the worst kind because it runs whether or not anybody is using the machine.
This matters at the other end of the job as well. Whoever refits the machine after the work has to get the same five things right. If they go back in wrong, so does the leak, and that is a callback nobody budgeted for.
The decision that sets the invoice
Two kitchens with the same leak, the same duration and the same footprint can be an order of magnitude apart, and the variable is almost never how much water arrived. It is what the water landed on. Every row below is determinable on a first visit by looking at a cut edge, a drilled hole or a doorway threshold.
| Material | How it behaves wet | Can it be saved | What decides it |
|---|---|---|---|
| Cabinet base and toe-kick, particleboard or MDF | Absorbs from the underside and the cut edges, swells, and loses most of its strength. The swelling is the fibres expanding, and they do not shrink back to where they were. | No. It gets replaced. | This is a replacement decision rather than a drying decision, and it is the same answer whether the material is dried quickly or slowly. What is worth deciding carefully is how much of the run comes out, because cabinet boxes come out in units rather than in square feet. |
| Cabinet base, plywood | Holds together far better than particleboard. It can swell and delaminate at the plies if it stays wet, but it will often dry and stay serviceable. | Frequently yes, if it is reached in time and the cavity can be dried. | The difference between a plywood box and a particleboard box is the difference between drying a kitchen and rebuilding part of one. Look at a cut edge or a drilled hole to tell them apart. |
| Solid hardwood flooring | Takes up moisture from the underside and cups, because the bottom face expands more than the top. Given time and even conditions it can flatten again as the board equalises. | Often yes. Dried in place with mats and controlled dehumidification, then sanded flat if any cupping remains. | The window matters more than the volume. Solid hardwood has a thick wear layer, so sanding is genuinely available as a repair, which is the reason it is the most recoverable flooring on this list. |
| Engineered hardwood flooring | The plywood or fibreboard core swells at a different rate and in a different direction from the layers around it, which lifts the ends and telegraphs to the surface. Water at the seams weakens the adhesive bonds between layers. | Sometimes. Cupping alone can recover. Delamination cannot. | Two questions, both answered by looking at an edge. Is the veneer thick enough to sand even once, and has the top layer started separating from the core. Delamination is terminal and no amount of drying reverses it. |
| Laminate flooring | The core is fibreboard. It swells at the edges and the joints, and the swelling shows as raised, chipped-looking seams. | Rarely. Swollen laminate is replaced. | The useful decision here is about the boards beyond the wet area, because matching a discontinued laminate is often impossible and the repair boundary ends up being a doorway rather than the damage. |
| Tile or luxury vinyl over a subfloor | The surface itself is usually unaffected. Water travels through the seams and the perimeter and sits underneath, where nothing shows. | The finish usually. The question is what is under it. | This is the material that most often produces an argument, because the floor looks fine. The subfloor reading decides it, and a floor that reads wet underneath does not dry by being ignored. |
| Subfloor, OSB or plywood | OSB swells at the edges and at the fastener lines and stays swollen. Plywood is more forgiving and usually dries. | Plywood usually. OSB depends on how far the edge swelling went. | The subfloor is the reason a small dishwasher leak becomes a floor replacement. If the panel edges have swollen proud, any new flooring laid over them telegraphs the ridge, so the panel gets replaced whether or not it is structurally fine. |
Telling plywood from particleboard takes seconds and settles the biggest question in the room. Look at a cut edge or inside a drilled hole. Plywood shows layers. Particleboard shows chips. MDF shows a uniform, dense, papery core. Two of those three dry. One does not.
Before anyone arrives
Six checks. The first one is worth more than the other five combined, and it needs a screwdriver at most.
Pull the toe-kick panel off the front of the dishwasher.
It is usually two screws or a snap fit and it takes less than a minute. Everything a slow leak has been doing for the last few weeks is behind that panel and nowhere else. Look for staining, a tide line on the subfloor, or standing water in the base pan.
Press the cabinet base beside the dishwasher, low down, near the floor.
Push with a thumb at the bottom edge of the cabinet next to the unit. If it gives, dents, or feels soft rather than hard, that is particleboard that has taken water and it is already past saving. This is the earliest reliable sign most people can get without tools.
Open the sink cabinet and look at the drain hose.
It should rise to a high loop fastened up under the counter, or run to an air gap fitting on the sink deck. If it runs flat from the dishwasher to the drain, that is a known install fault and it is worth fixing whether or not it is the source today.
Look at the floor seam right at the front edge of the dishwasher.
That joint is where water leaves the recess and enters the room. Lifting, darkening, chipped-looking edges on laminate, or a board that stands slightly proud of its neighbours all say the water has already been out here.
Run a cycle and watch, at the start and again at the pump-out.
Water at the start of the fill points at the supply side or the inlet valve. Water at the pump-out points at the drain hose. Water throughout points at the door gasket or the pump. Five minutes of watching narrows six possibilities to two.
If there is a room under the kitchen, look at its ceiling.
A stain there means the water has been going through the floor rather than across it, which is a longer-running leak and a bigger scope. Look near the wall line as well as directly under the appliance, because water travels along joists before it drops.
One warning on the second check. If the cabinet base gives under a thumb, stop pressing. There is nothing to gain from finding out how far it goes and a soft base can be carrying a loaded shelf above it.
What moves the number
The estimate is free, and the number for your kitchen comes from readings rather than from a phone call. What is publishable is the list of things that move it, in rough order.
How long it ran before anybody saw it
The largest lever, and it is decided before the first phone call. A pressurised weep behind a toe-kick can run for weeks. A door gasket only leaks during a cycle. Same appliance, completely different scope.
Whether the cabinet run has to come out
Cabinets come out in boxes, not in square feet. A single swollen base can mean pulling and refitting a run, and if the countertop is stone it has to be supported or lifted, which is its own trade and its own day.
What the flooring is
Solid hardwood dries and sands. Engineered may not survive a sand and cannot survive delamination. Laminate is replaced. Tile and vinyl usually survive while hiding a wet subfloor. Four materials, four different numbers on the same footprint.
Whether the subfloor panel edges swelled
A swollen OSB edge telegraphs through any new flooring laid over it, so the panel comes out even when it is structurally sound. This is the step that turns a kitchen repair into a floor replacement.
Whether the water was clean or from the drain side
Supply-side water is clean and the save window is wide. Water from the drain hose or from a disposal connection is not, and porous material in the affected area comes out rather than being dried.
Whether a room below is involved
A leak that went through the floor rather than across it doubles the number of rooms and adds a ceiling, and it means the joist bays have to be dried rather than just the surface above them.
Access
A dishwasher in a peninsula or an island with plumbing running through the floor is a different job from one in a straight run against a wall. It changes what can be reached without opening something else.
Sequence
The first two rows are yours and they matter more than anything we do afterwards, because they are the only chance anybody gets to record what was actually under there.
Hour 0
Shut the water and stop the cycle
The dishwasher shut-off is usually under the sink. If you cannot find it, the house main is the honest fallback. Then power the unit off, because the next steps involve reaching behind it.
Hour 0
Pull the toe-kick and photograph
Timestamped photographs of the base pan, the subfloor under the unit, and the cabinet bases either side. Take them before anything is mopped up, because that is the only record of the extent that will ever exist.
Day 0
Meter it, including under the cabinets and the floor
Readings taken against a dry standard from an unaffected part of the same kitchen. The dishwasher recess is the smallest part of what gets measured. On site in 60 minutes, the estimate is free, and the scope is written down.
Day 0
Decide the material questions out loud
Particleboard or plywood cabinet base. Solid or engineered flooring. OSB or plywood subfloor. Those three answers set most of the number and they are all determinable in the first visit.
Days 1 to 2
Open only what is needed to reach the cavity
Toe-kick off, base panels out where the material has failed, and airflow into the cabinet cavity and under the floor where the assembly allows it. A cavity nobody can get air into does not dry no matter how long the equipment stays.
Days 2 to 5
Dry, logged daily
Under-floor drying with mats where hardwood is being saved. Cabinet cavities run longer than open rooms because circulation in them is poor. It ends on a reading, not on a date.
Then
Replace the appliance connection properly, then rebuild
Whoever refits the machine should get the high loop or air gap right, level the unit, and seat the gasket. If the same five install faults go back in, so does the leak.
Before anyone starts
These work on our estimate as well as anyone else’s, which is the point of publishing them. The first one is the one that separates people who have looked from people who have guessed.
“Have you pulled the toe-kick and looked under the unit?”
If the answer is no, nobody has seen the leak yet. Everything else is a guess made from the kitchen floor.
“Is the cabinet base particleboard or plywood, and how did you check?”
A cut edge or a drilled hole answers it in seconds and it is the difference between drying a kitchen and rebuilding part of one.
“Is my flooring solid or engineered, and what does that do to the plan?”
Solid can be dried and sanded. Engineered may not survive a sand and cannot survive delamination. The answer should change the drying plan, not just the paperwork.
“What is the subfloor reading, and have the panel edges swollen?”
This is the question that decides whether the floor comes up. A swollen edge telegraphs through anything laid over it.
“Was this supply-side water or drain-side water?”
It changes the category, and the category changes what is removed rather than dried. It should be established from where the leak is, not assumed from how clean it looks.
“Who is refitting the appliance, and will they fix the install faults?”
The high loop, the level, the gasket seating and the fitting torque. If the same faults go back in, so does the leak, and that is the callback nobody schedules.
The honest part
If you pull the toe-kick and find a damp patch on a bare subfloor with a hard cabinet base either side, the answer is an appliance tech to fix the leak, a fan, and nothing from us. That happens often enough to be worth saying at the top of a section rather than in a footnote.
The appliance itself is somebody else’s trade in every case. A door gasket, a drain hose, an inlet valve, a pump seal or a supply fitting is an appliance tech or a plumber, and cleaning up before the leak is stopped is spending money on a repeat.
Where we are the right call is narrower and worth stating plainly. When cabinet bases have failed and a run has to come out and go back. When the flooring is cupping and there is a real decision about drying in place versus replacing. When the subfloor is wet under a tile or vinyl floor that looks perfectly fine. And when the water went through the floor into a room below rather than across it. Those are the versions where getting the sequence right saves more than the visit costs, and outside them we would rather tell you who to ring.
Because of how a dishwasher is installed, and it is worth understanding because it explains why these leaks are found late. The unit sits in a recess with its own base pan under it, and a removable toe-kick panel across the front. That panel hides the entire floor of the recess, so for the first weeks of a slow leak there is nothing to see from the kitchen. Meanwhile the water spreads across the subfloor and reaches the cabinets on either side, and the base of a kitchen cabinet is very often particleboard or MDF sitting directly on that subfloor with almost no ventilation under it. Particleboard wicks from its underside and its cut edges, swells, and shows. So the first visible symptom of a dishwasher leak is usually the neighbour: a cabinet base that has gone soft, a toe-kick that looks swollen, or a floor seam lifting at the front edge of the appliance. By the time it is visible, the recess behind the panel has been wet for a while.
Six places, and they are separable by when the water appears. The door gasket leaks at the front, only during a cycle, and often as a thin line rather than a pool. The supply line and its fitting leak whether or not the machine is running, because that side is pressurised all the time, which makes it the version that does the most damage per week. The water inlet valve at the bottom leaks at the start of a fill and its body can crack from an over-tightened supply fitting. The drain hose and its clamps leak during the pump-out phase and often inside the sink cabinet rather than at the appliance at all. The pump seal leaks underneath during a cycle. And the tub or the heating element seal leaks underneath and toward the back, which is usually the end of that machine. Five minutes watching one full cycle, once at the fill and once at the pump-out, narrows six possibilities down to two.
Usually not. Five install faults account for most new-install leaks, and all five are findable. First, the knockout plug in a new garbage disposal was never removed, so the drain hose has nowhere to send its water. Second, the drain hose runs flat instead of rising to a high loop under the counter or an air gap on the sink deck, which lets water travel the wrong way. Third, the unit is not level and leans forward, so water collects at the door rather than staying where the manufacturer intended. Fourth, the door gasket rolled, twisted or pulled out of its channel when the machine was pushed into the recess. Fifth, the water connection was over-tightened, which cracks the valve body, or cross-threaded, which weeps on the pressurised side. You can check two of those from inside the sink cabinet in under a minute with a torch, and it is worth doing before anybody is called out.
If it is plywood, often yes. If it is particleboard or MDF, no, and it is better to hear that early. Saturated particleboard swells because the fibres take up water and expand, and it loses most of its strength doing so. It does not shrink back to where it was when it dries, and the strength does not come back either. So a swollen cabinet base is a replacement decision rather than a drying decision, and the useful conversation is about how much of the run has to come out rather than whether the piece can be saved. Cabinets come out in boxes rather than in square feet, and if the countertop is stone it needs supporting or lifting, which is a separate trade. Telling the two materials apart takes seconds: look at a cut edge or inside a drilled hole. Plywood shows layers. Particleboard shows chips and MDF shows a uniform, dense, papery core.
Not necessarily, and the answer depends on which kind of hardwood it is. Cupping means the underside of each board has taken up more moisture than the top, so the edges rise. On solid hardwood that is frequently recoverable: dried in place with mats and controlled dehumidification, boards often flatten as they equalise, and where any cupping remains the wear layer is thick enough that sanding flat is a genuine repair. Engineered hardwood is a different case. Its core swells at a different rate and in a different direction from the layers around it, which lifts the ends and telegraphs to the surface, and water at the seams attacks the adhesive between the layers. Cupping alone can still recover. Delamination, where the top veneer starts separating from the core, cannot, and no amount of drying reverses it. The other question on engineered is whether the veneer is thick enough to survive even one sanding, and that is answered by looking at a cut edge at a doorway or a vent.
Possibly, and this is the situation that produces the most disagreement. Tile and luxury vinyl are not damaged by the water themselves. The water travels through the grout, the seams and the perimeter, sits on the subfloor underneath, and nothing on the surface changes. So the floor looks fine while the panel under it is wet. The only way to settle it is a reading rather than a look, taken through the assembly and compared to a dry standard from an unaffected part of the same kitchen. If the subfloor reads wet it does not dry by being left alone, because there is a finished floor on top of it acting as a vapour retarder. Where that is the case the honest options are drying through the assembly if the construction allows it, or lifting a section. What is not an option is deciding it from the surface, and anybody who tells you the floor is fine because the tile is fine has not measured anything.
When the panel edges have swollen proud, and this catches people out because the panel is often still structurally sound. Oriented strand board takes up water at its cut edges and at the fastener lines, swells there, and stays swollen after it dries. That leaves a raised ridge along every panel joint. Any new flooring laid over that ridge telegraphs it, so a floor that would have been fine structurally still gets replaced for a finish reason. Plywood is more forgiving and usually dries back to something you can lay over. So the sequence is: dry it, then look at the edges, then decide. Deciding before drying costs money on a panel that would have been fine, and laying a new floor over a swollen edge costs the new floor as well.
Faster than the appliance suggests and slower than a panicked phone call implies. The reason speed matters is not the volume, because a dishwasher leak is often only ounces per cycle. It is that the water is landing on and in materials that respond badly and irreversibly: particleboard swells and does not return, subfloor edges swell and stay swollen, and hardwood cupping is far more recoverable in the first days than in the second week. Growth after a water loss is a moisture problem before it is anything else, and a closed cabinet cavity with no ventilation is exactly the condition that produces it. So the useful actions are all immediate and all free: shut the supply, power the unit off, pull the toe-kick and photograph what is under there before anybody mops. After that, a moisture reading is worth more than a fast decision.
Sources
The six failure points, the door gasket, the supply line and its connection, the water inlet valve at the bottom of the unit, the drain hose running from the pump to the disposal or the sink drain, the pump seal, and the tub and heating element, come from published appliance manufacturer and repair trade material read this run.
The five install faults, the disposal knockout plug, the requirement for a high loop or an air gap rather than a flat drain run, the unlevel unit collecting water near the door, the door gasket rolling or twisting out of its channel on insertion, and the over-tightened or cross-threaded water connection cracking the valve body, come from published installation trade material, as does the statement that a few ounces of water per cycle can destroy cabinet bottoms, flooring seams, toe-kick spaces and subfloor.
That the base of a kitchen cabinet is often particleboard or MDF and more susceptible to water than solid wood, that the area has poor ventilation and traps moisture, and that saturated particleboard swells, deforms and loses most of its strength and generally has to be replaced, come from published restoration and building trade material.
The flooring behaviour comes from published wood flooring trade material: that solid hardwood is highly absorbent and prone to cupping, that engineered flooring has a hardwood veneer over plywood layers whose core swells at a different rate and direction from the adjoining layers and lifts the ends, that delamination occurs when water weakens the adhesive bonds between layers, that fast drying in the first 24 to 48 hours improves recovery, that minor cupping may flatten once conditions normalise, and that light sanding can flatten boards that remain cupped after drying.
Water categories, dry-standard readings, drying practice and the removal sequence on contaminated water follow restoration industry standard. The explanation of why damage appears beside the appliance rather than under it is this page’s own reading of the installation geometry and the cabinet material behaviour above, and it is presented as reasoning rather than as a citation.
No price, cost range or claim figure appears anywhere on this page. One source read this run published a figure for the typical size of a residential water damage claim and it is deliberately not reproduced. Nothing here describes a customer, an address or a job. No health effect of mold or moisture exposure is asserted; for anything in that category the right source is a physician or a public health authority, not a restoration contractor. Appliance, plumbing and electrical work should be confirmed with a licensed contractor in that trade for your specific equipment.
24/7 dispatch across Macomb and Oakland County. On site in 60 minutes. The estimate is free, and it comes with moisture readings, a written scope, and an honest answer about whether you need us at all.
Call (586) 277-1069Prime Restoration is a Michigan licensed residential builder (MI Residential Builder #262500492) and a full-service restoration contractor serving Macomb and Oakland County from Sterling Heights. Nothing on this page is legal, plumbing, electrical, appliance, engineering or medical advice. Scope and cost are set from actual moisture readings and affected area. Guidance here is general and is not a substitute for an inspection of your kitchen.